internal and external plastering
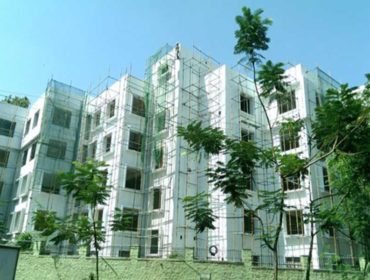
Plastering in Building Construction
This work procedure covers the practical method to be followed while carrying out Internal and External Plastering works over the masonry walls and ceiling in line with the approved technical standards and specifications.
IS:1661- 2013, IS 1542 : 1992
Mason trowels, Aluminium Straight edge, line threads, plumb bobs, bucket, spirit level, necessary scaffolding, tube level, wooden float, wheel barrow, pan, spade, sieve mesh, steel brush, Measurement boxes, Metal tray, Measurement tape, right angle, chipping tools, floating trowel, water barrels, MS sheets, Blue polythene sheets for plastering protection against rain, Water proofing compound, 1” thick groove making straight edge, sponge.
a) Ensure all workers are wearing necessary PPE before starting the work.
b) All tools and equipment must be in place of work
c) Daily Safety Induction to be conducted and the risk involved in the work is anticipated well in advance and training to be given accordingly.
d) Ensure all openings, cut-outs, staircase areas, External balconies are barricaded properly before commencement of work.
e) Always use double scaffolding during brick work or block work, in order to avoid holes in the masonry.
f) Unavoidable situations, where single scaffolding is provided, after block work, plug holes properly with good blocks including joints filling.This has to be done at least 3 days before the starting of plastering works and cured properly.
Surface preparation :
- Make sure that all test certificates for the materials being used are submitted to the consultant and approval for the method statement submitted from the consultant.
- Make sure that all masonry works fully completed, including electrical pipe works, D.P boxes, switch boxes, door, window frames etc., where Internal plastering works or Plastering in Building construction are intent to start.
- Before starting Internal plastering/external plastering, all surfaces to be sprayed with water and should be allowed to dry out naturally.
- All concrete surfaces must be hacked properly with deep and closely spaced by 25 mm wide and 25 depth.
- All junctions of block work, brick work and RCC column, beam, slab members to be properly fixed with 4” wide chicken mesh over the joint.
- For electrical conduits also packing to be done in CM 1:4 first and then over that, chicken mesh is to be fixed for better bondage.
GI expandedmetal mesh fixing :
- This GI expanded metal mesh should be fixed over the junction with quality nails for internal Plastering and external plastering.
- The nails to be driven into the RCC beams or columns after drilling a hole and also over brick or block masonry directly.
- The nails should be staggered and bent to protect the mesh support.
- Over this, a thin coat of rich mix plaster application is advisable for better bondage and also to prevent cracks developed at later stage. This coat is to be cured for at least 3 days.
- All vertical corners of external and internal plastering walls should provide with galvanized metal corner beads in order to safeguard against the damages to the corner angles.
- As far as possible, for better durability, and preventive measures against cracks in plastering, all plain surfaces are to be finished in one stretch.
Mixing :
- Mix recommended for Ceiling plastering is 1:3 and wall plastering or internal plastering or Internal render mix is 1:6, should be mixed always in a water tight platform or use metal tray.
- The mixing should be in uniform colour and consume within 1 hour duration.
Application :
- Reference leveling pads for thickness of plastering for all surfaces ( 12 mm for internal walls and 20 mm for External walls with two coats of plastering) to be fixed well in advance.
- These marks to be fixed to the reachable length of aluminium straight edge used for plastering say 6’0” intervals.
- If the thickness of Internal plastering is more than 15 mm, then it should be done in two coats, the first layer to be properly cured and a gap of at least one day is required for the next coat of plastering.
- The type of finishing for the surface to be confirmed from the consultant well in advance like lime rendering/Internal lime plaster, rough coat, smooth cement trowel finishing, sponge finishing, texture finishing, stucco work etc.
- Use appropriate tools for plastering, example, for smooth finishing by trowel, 1” thick straight edge for making groove, sponge finishing by sponge, float trowel for lime rendering.
- Simultaneous checks for verticality to be checked with plumb bob, horizontal lines by holding line threads or aluminium straight edges and band levels, top levels, offsets by measuring tape and level tubes.
Finishing :
- All works for internal plastering should be checked by flashing halogen lights over respective wall or ceiling surfaces and if any undulations found, to be set right immediately while the plastering is still in green.
- Accuracy and perfections to be maintained for skirting line, Electrical switch boxes for line and level, fan, cut-outs and all junction boxes with suitable shape before complete plastering works.
- Internal Lime plaster or Lime finishing to be done for Internal plastering surface after a gap of 3 to 4 hours to setting time for CM
- For Elevation purposes or demarcating concrete surfaces like columns, roof slab and beams, grooves coming over external plaster, to be finished properly without creating a patchy joint.
Curing :
- Curing to be strictly monitored as per marking date of plastering in paint over the surface to the required duration (generally 7 days)
Connect with us to avail a complete construction services
CONTACT US
15/4, gurunath 2 A cross Hanumagirinagar, Chikkallasandra Main Road Subramanyapura,
Bengaluru – 560061
info@myhomemydesign.in
Our Happy Clients
Client Testimonials


LLP, Ex-President- RMC Readymix (India)


MBBS and Chairman at PRANA MEDICAL CENTER, SPECIALIST CENTER FOR DIABETES, ENDOCRINE,
OBESITY. – Kodambakkam – Chennai- 600024
Always Dedicated & Devoted
Latest Projects
Excavation for basement and footing
Compaction of Concrete

Building ByeLaws for Residential Buildings – All You Wanted to Know
How to Plaster Your House? Guide for Home Plastering
EXTERIOR PAINTS – PAINTING WORKS
